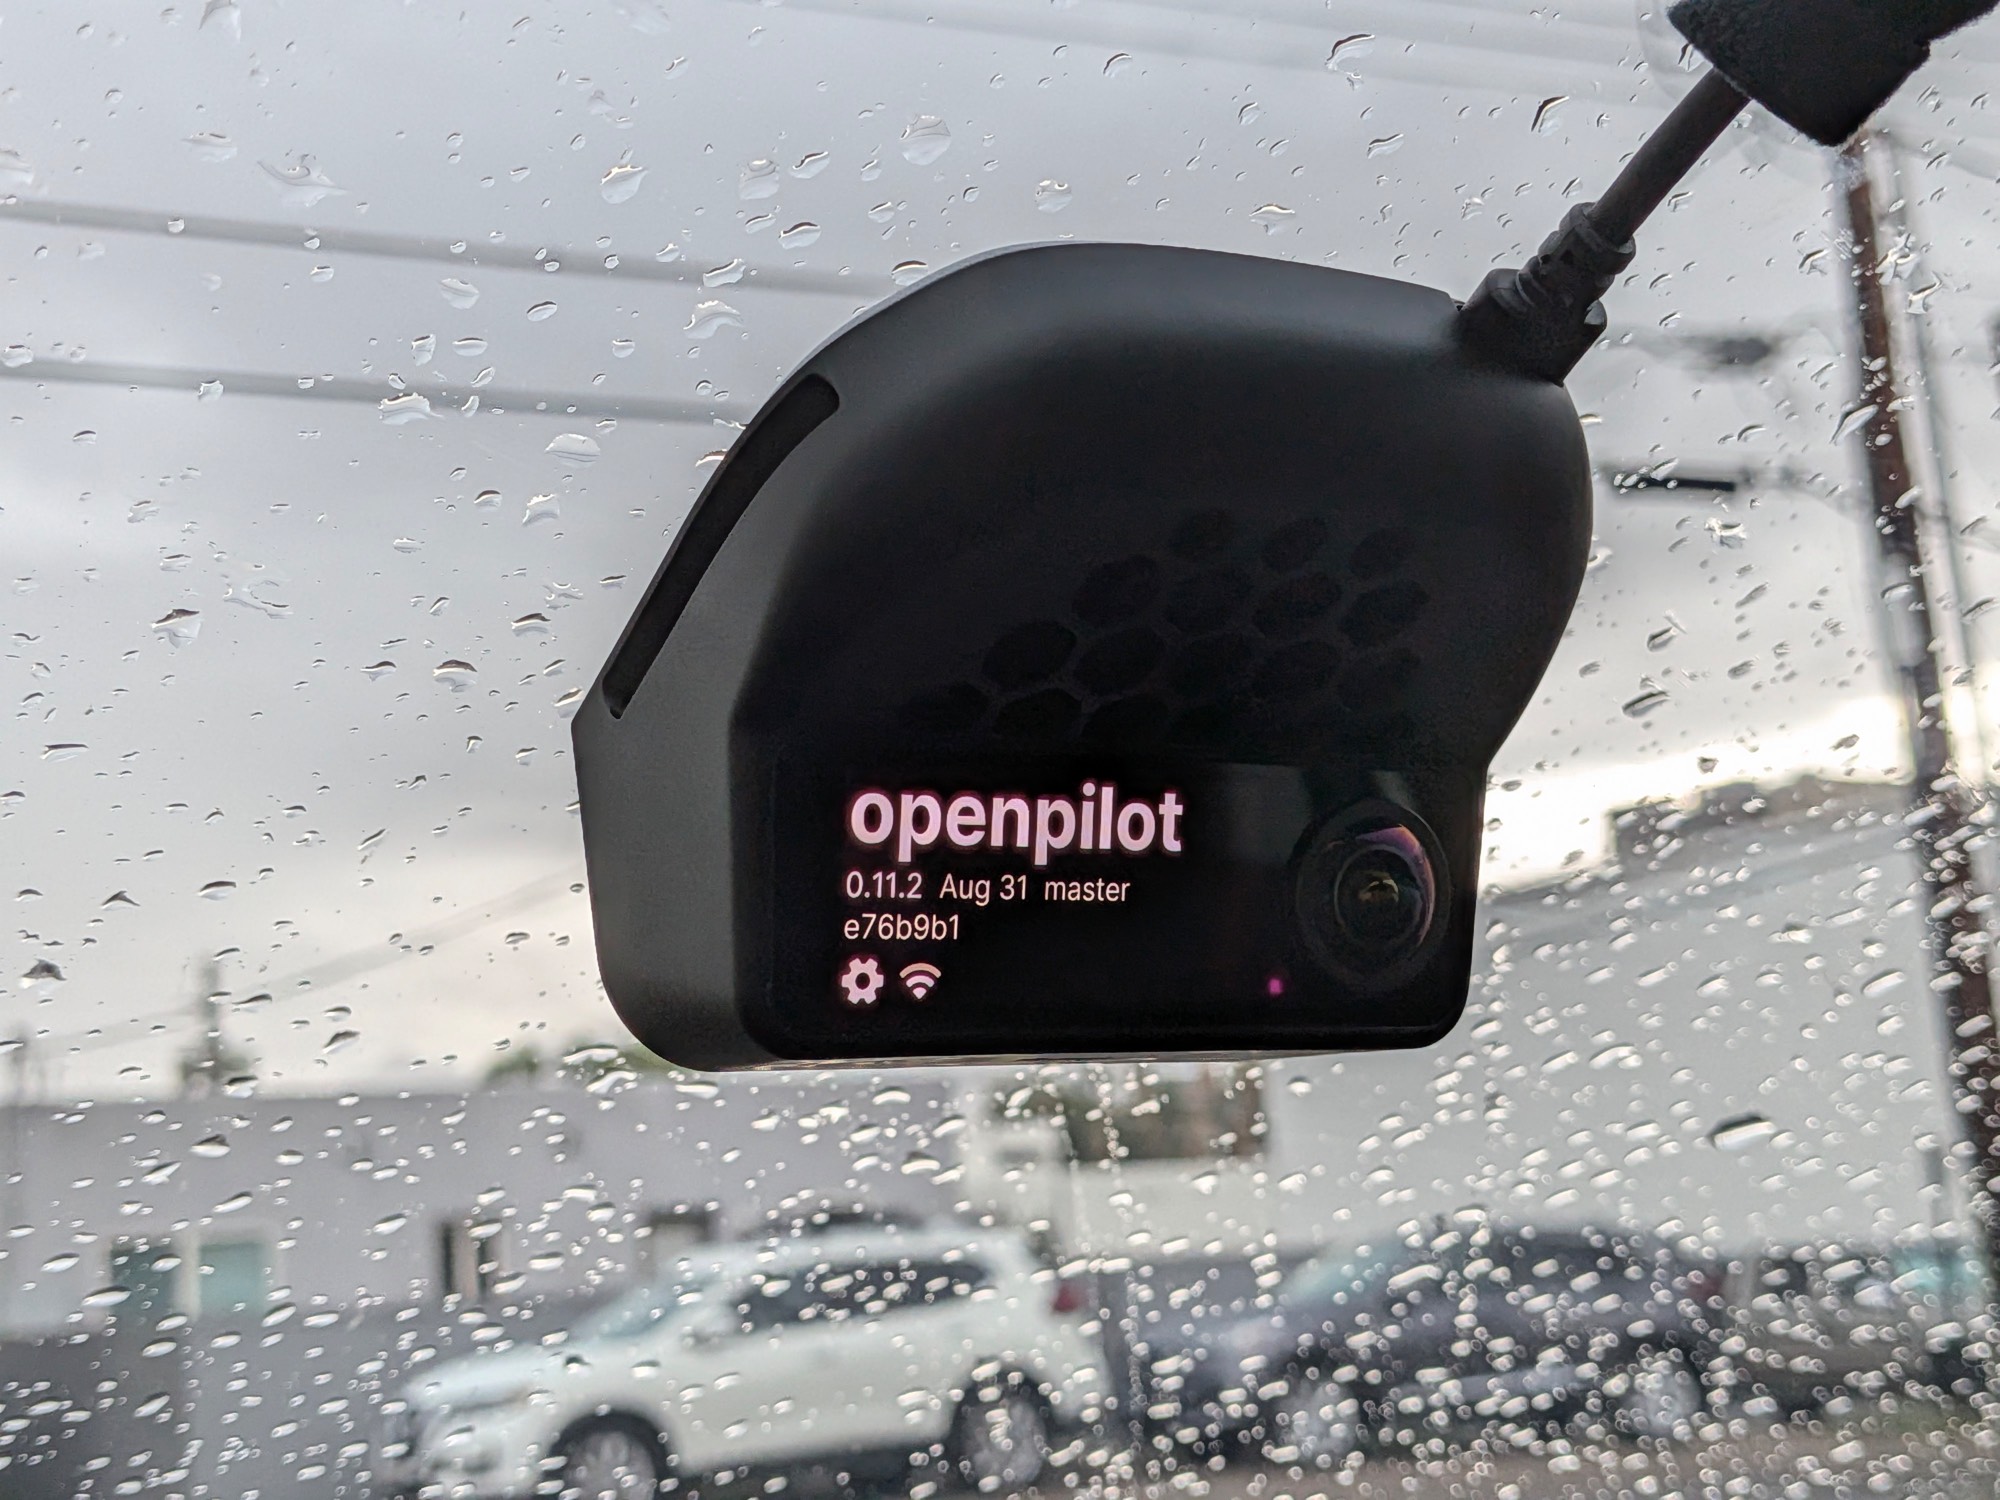
Installing a Subaru D harness in a 2023 Subaru Outback
I recently bought a comma four from comma.ai and plan to get openpilot working on my car. This article walks through the process of installing the included Subaru D harness in a 2023 Subaru Outback with the dual-camera EyeSight system. In theory, other 2023-and-newer cars built on the Subaru Global Platform should come apart in a similar way, although some models may not have the two screws shown here.
The short version is simple: 1. Remove the overhead cover around the EyeSight cameras. 2. Plug the D harness in between the factory cable and the EyeSight unit. 3. Tuck everything away and put the cover back on.
The only genuinely fiddly part is dealing with the clips and the hooks along the front edge of the cover. The EyeSight camera is also a precision part, so do not touch it or let the cover or any cables block its view. There is a frame underneath the camera, which makes it fairly hard to hit by accident, but it is still worth being careful. In particular, do not poke the EyeSight unit with the cover while trying to put the cover back on.
[!IMPORTANT] Installing the harness only requires removing the outer EyeSight cover. You do not need to remove or reposition the dual-camera unit itself. After the installation, the factory EyeSight system should continue working normally when no comma device is connected, and the car should not report any new fault codes.
Before you start
These are the original Subaru procedures on Lemon Manuals:
You will need:
- A Subaru D harness
- A small socket that fits the two screws and a ratchet. I used a 5/16-inch socket, although the screw is probably metric and there may be a better-fitting metric size.
- A plastic trim tool, if you have one. You can also release the cover carefully by hand.
- A little patience
Park the car, shift into P, set the parking brake, and turn the car off. The Subaru service manual tells you to disconnect the ground terminal from the 12 V battery sensor before doing this job. I did not disconnect the battery when I installed mine, but at the very least, the car should be completely powered off before you unplug the EyeSight connector.
1. Open the sunglasses holder and remove the two screws
Open the overhead sunglasses holder. There are two screws near the top, at the two red dots in the picture below.
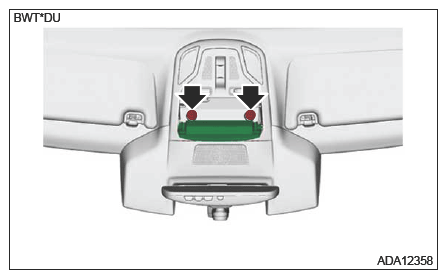
Use a socket that fits properly, remove both screws, and put them somewhere they cannot roll away.
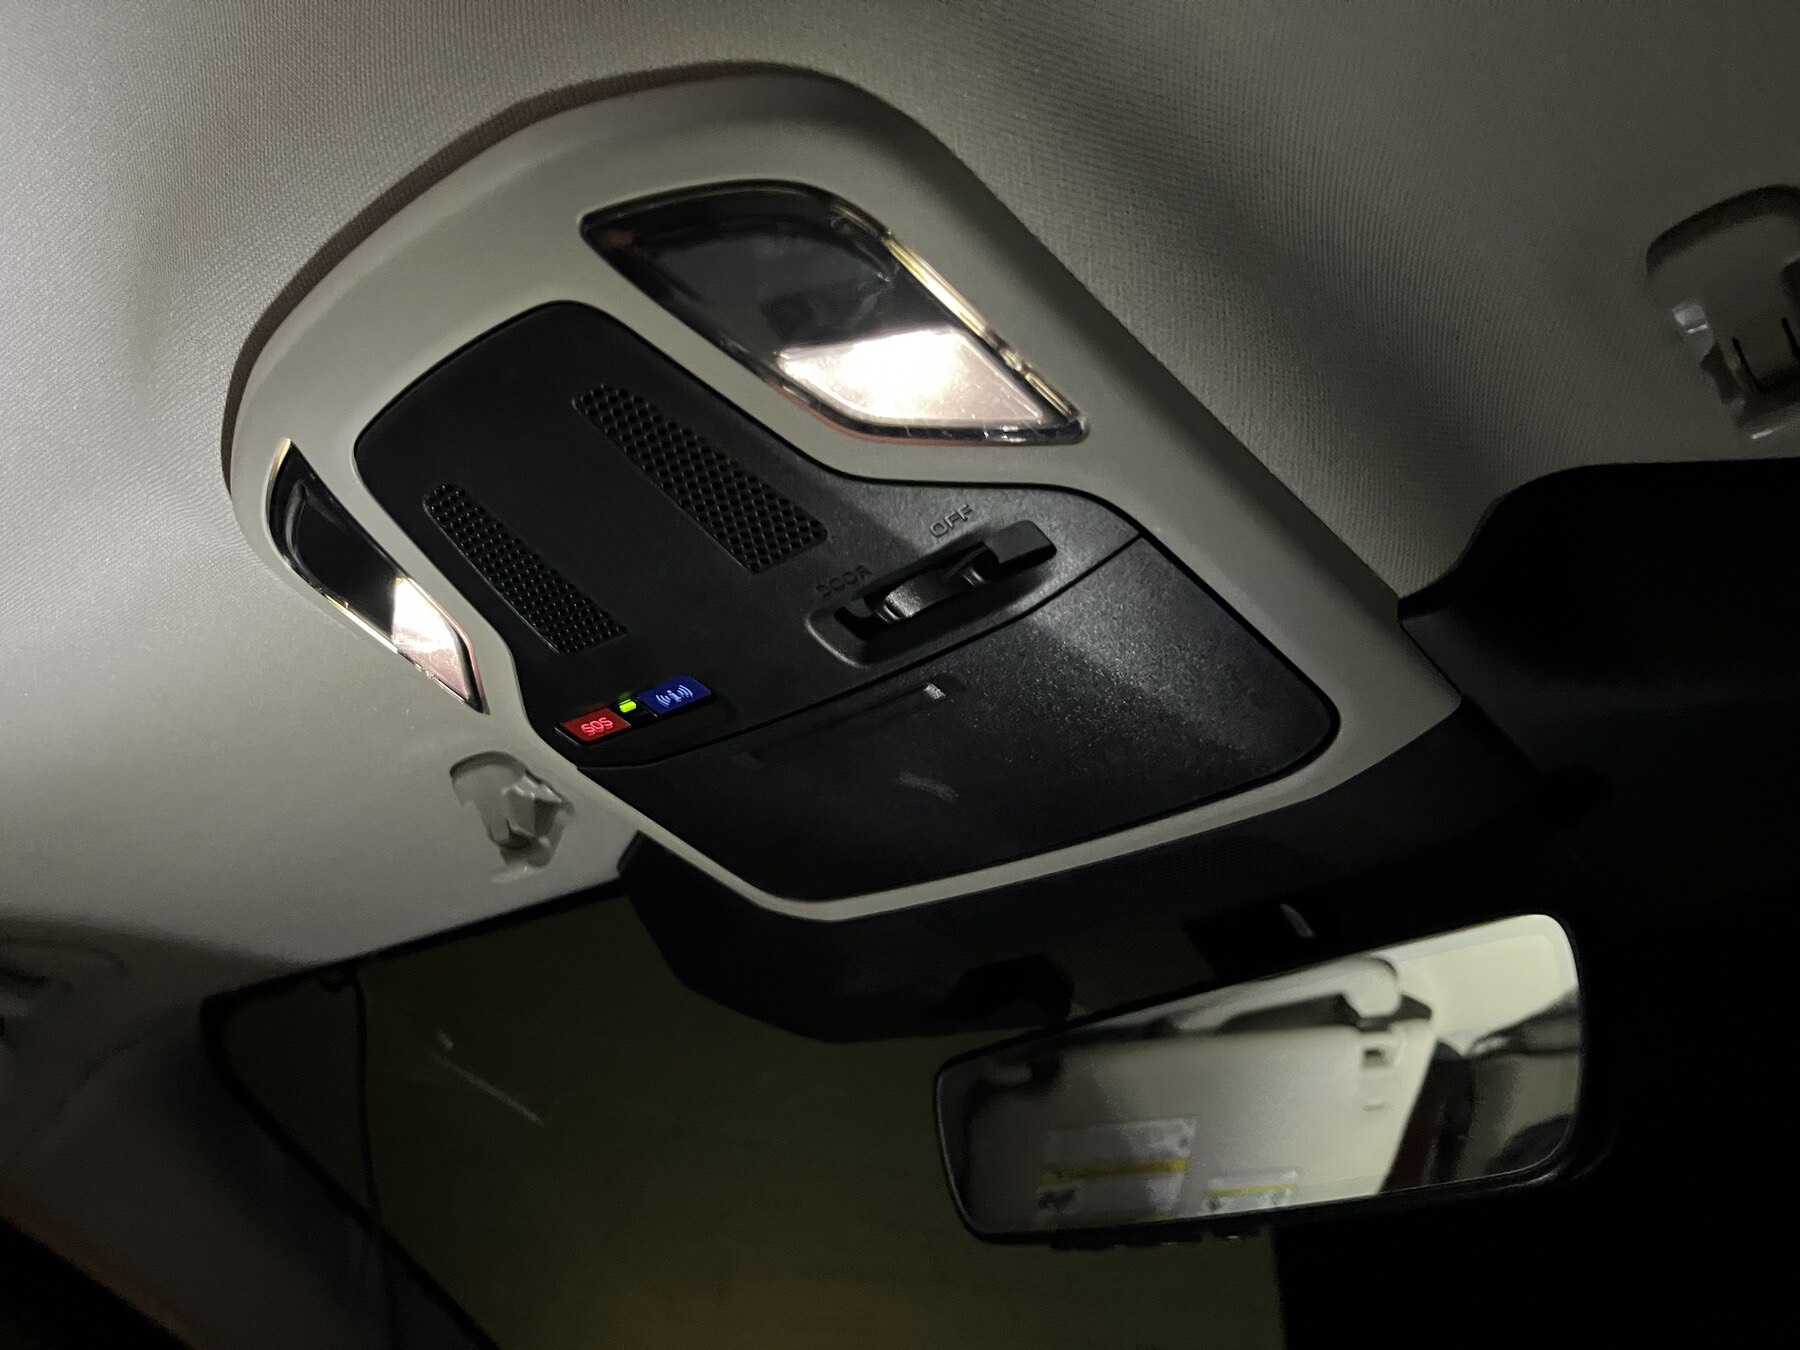
This is what the cover looks like:
2. Remove the EyeSight cover
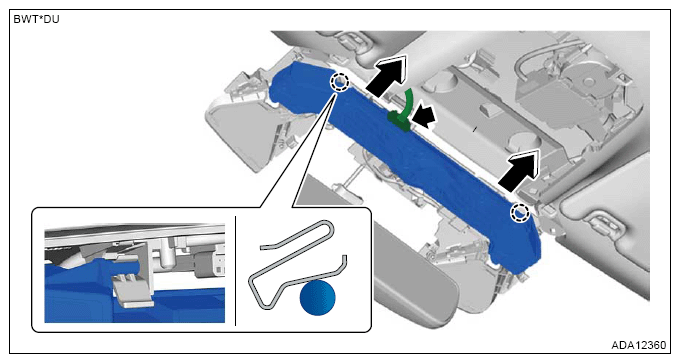
In the picture below, the circles mark the clips, while the triangles mark the hooks and interlocking tabs. Do not simply yank the entire cover straight down.
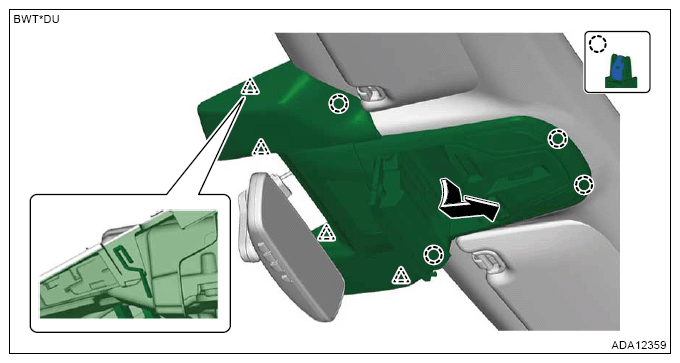
- Start at the rear of the cover, on the side closer to the passenger compartment. Slowly pull that end downward and release the four circular clips one at a time.
- Once the clips are loose, keep the cover roughly level and pull it toward the rear of the car—away from the windshield—to release the four hooks along the front edge.
- Support the cover with your hand once it comes loose. Do not let it drop or swing into the EyeSight camera.
Releasing the hooks can be frustrating. If one side refuses to move, check again for a clip or hook that is still engaged instead of forcing it. If you want to remove the cover completely, you can unplug the overhead lights, microphone, sunroof controls, and any other connectors attached to it. If you already have enough room to work, you can leave those plugs connected and have someone hold the cover for you. That is what I did. Without a second person, the cover gets in the way once you need both hands for the wiring.
3. Find and unplug the factory EyeSight connector
With the cover out of the way, you can see the dual-camera EyeSight unit—part number 87501AN11B SVS350 on my car—and the wiring above it. The connector we need is marked in green below.
The factory connector is white:
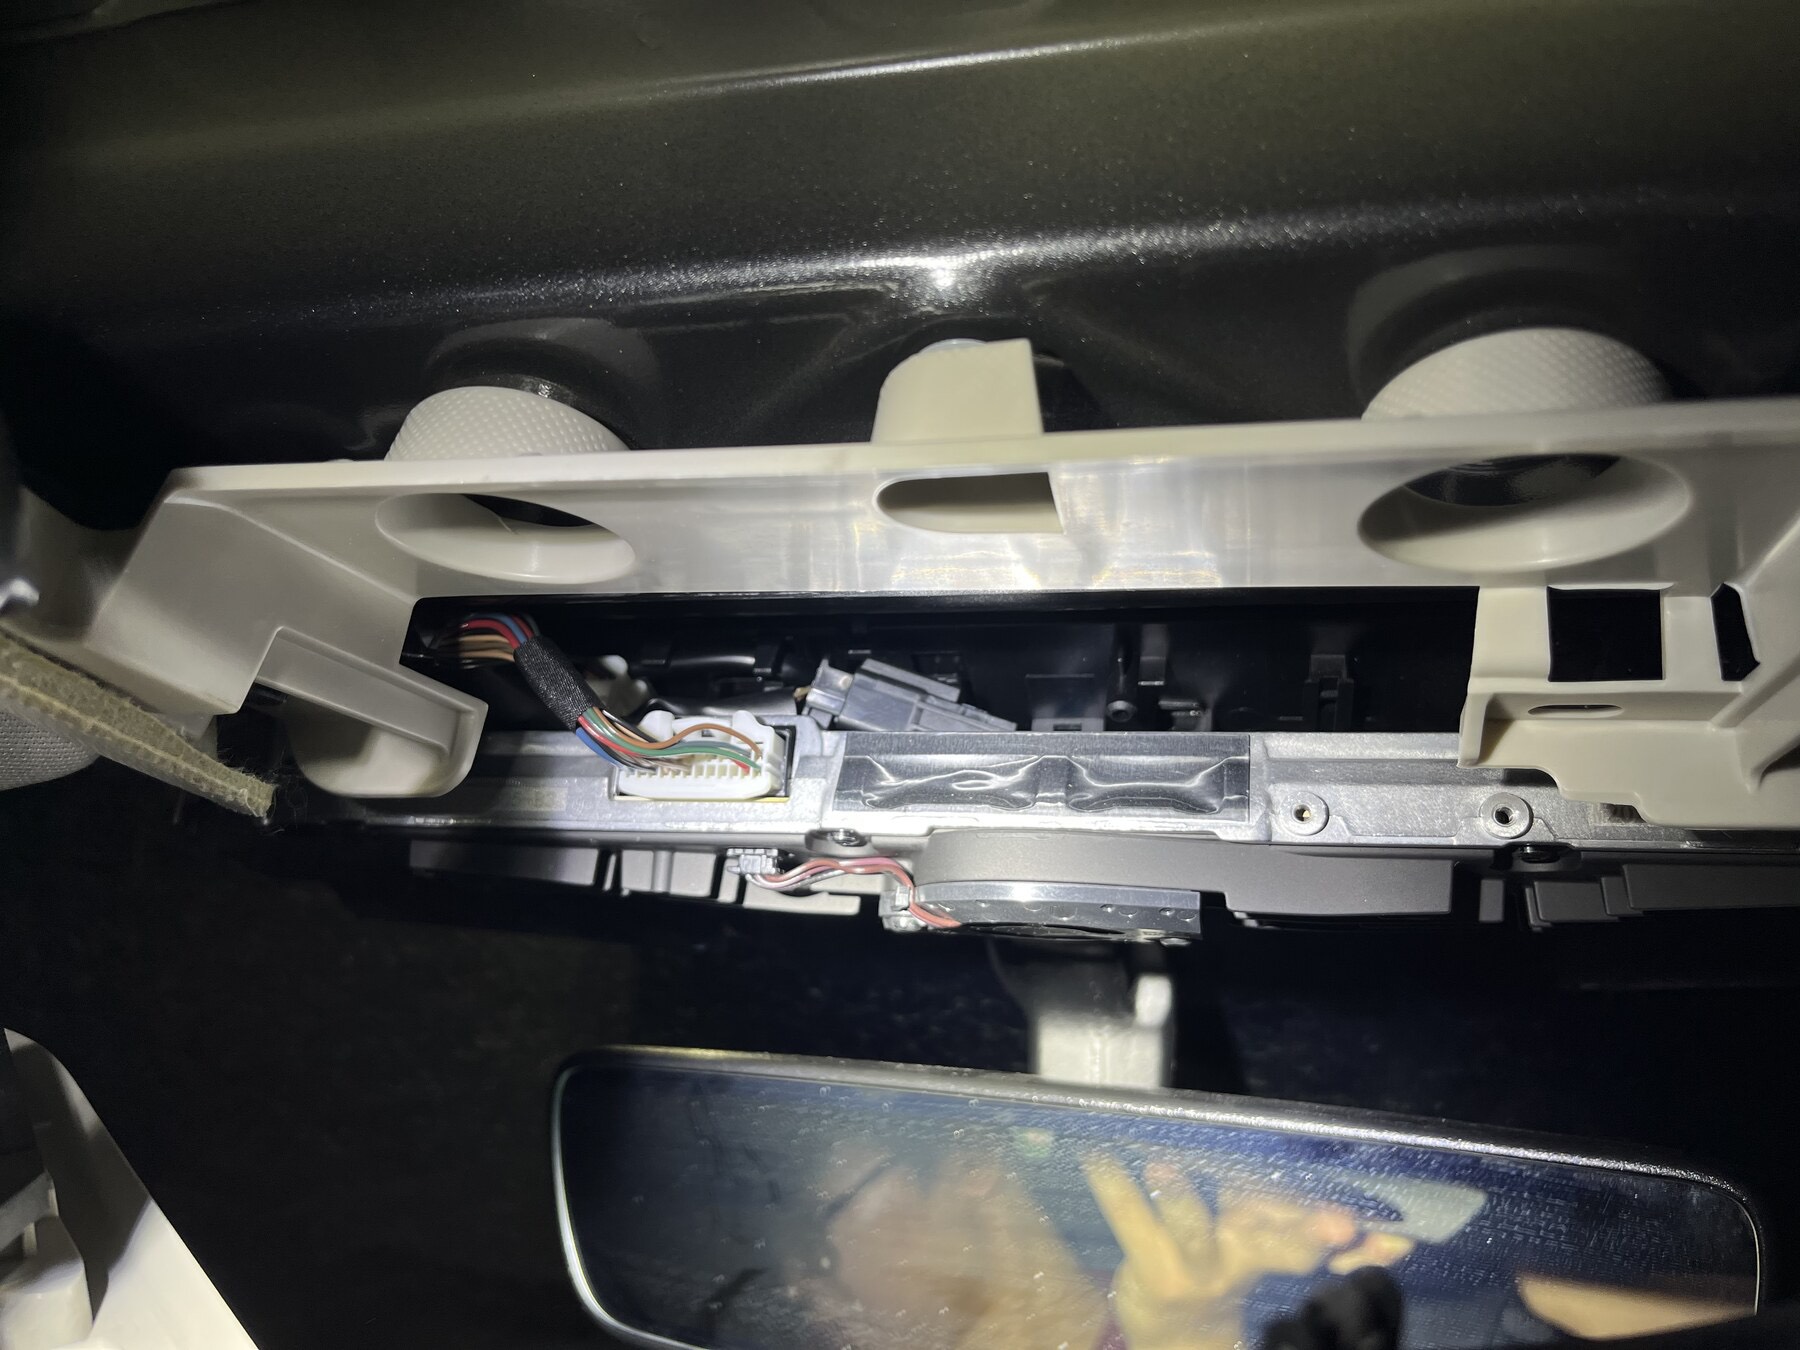
Find the locking tab, press it, and pull the connector straight out by its plastic housing. Try not to touch the body of the EyeSight camera unit itself.
4. Connect the Subaru D harness
The Subaru D harness is an adapter that sits between the factory wiring and the EyeSight camera. Connect it in this order:
- Plug the factory white connector you just removed into the matching socket on the D harness.
- Plug the other end of the D harness into the original socket on the EyeSight camera.
- Push each connector all the way in and make sure its locking tab clicks into place.
5. Tuck away the harness and route the two cables
The area above the camera already holds wiring for the microphone, overhead lights, and sunroof controls. There is enough unused room there to tuck away the D harness and Panda. The finished wiring can look something like this:
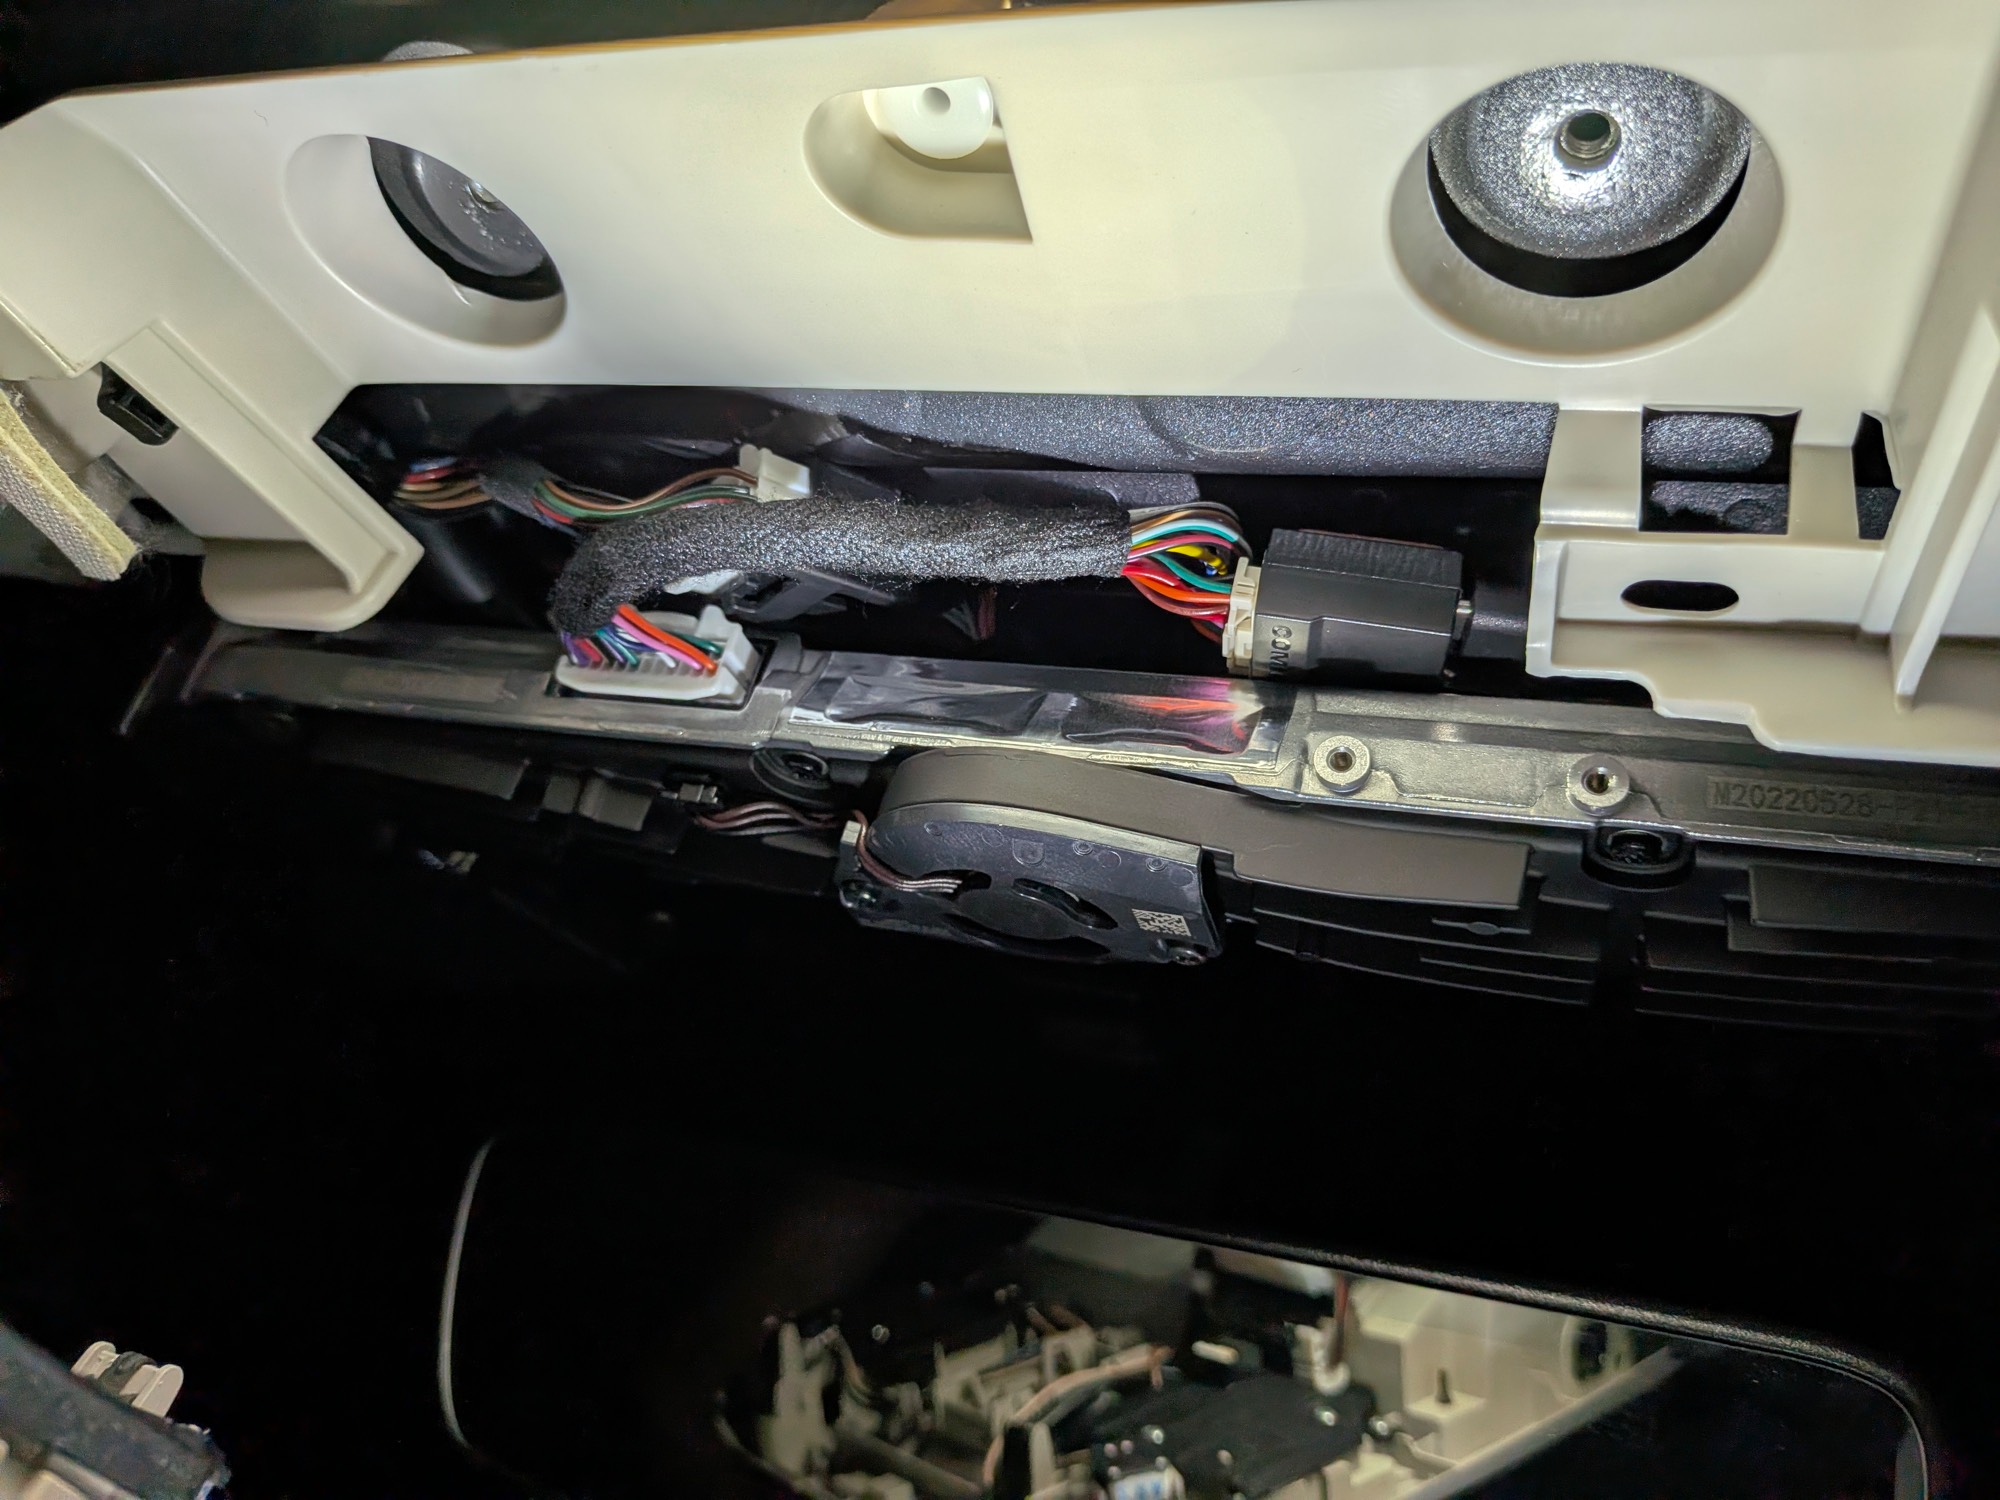
Before putting the cover back on, route the two cables used by the Panda out from under the cover. I ran mine like this:
- The USB-C cable exits on the right, toward the passenger side, and then runs to the comma four.
- The OBD cable exits on the left, toward the driver’s side, because the OBD port is down below the left side of the driver’s seat.
This is not the only way to route the cables, but splitting them left and right is convenient and points each cable toward where it ultimately needs to go. Leave enough slack, then make sure neither cable will be pinched by the edge of the cover.
6. Put the cover back on
Installation is the reverse of removal: engage the hooks along the front edge first, then snap the rear and outer clips back into place.
- Support the cover and line up the hooks on the windshield side with the bracket, then slide them into place.
- Once the front edge is properly engaged, push the rear of the cover upward and snap in the clips one at a time.
- Check all the way around the cover. The gaps should look even, with no wiring sticking out or trapped underneath.
This is usually the part that takes the most patience. The front hooks may not line up on the first try, but do not use the cover to push against the EyeSight camera. If it does not feel right, pull the cover back, line it up again, and try another time. It will eventually go in. This step took me about ten minutes.
If you unplugged the overhead lights, microphone, sunroof controls, or any other connectors earlier, remember to reconnect all of them before snapping the cover into place.
7. Power everything on, check it, and reinstall the screws
If you disconnected the 12 V battery ground before starting, reconnect it now using the factory procedure. Turn the car on and check the following:
- The comma four powers on and can read data from the car.
- No new EyeSight, camera, or other warning appears on the instrument cluster.
- The overhead lights, microphone, sunroof controls, and other parts of the cover still work normally.
- The two outgoing cables move freely and are not pinched or pulled tight.
Once everything works, reinstall the two screws inside the sunglasses holder. Tighten them evenly, but do not overtighten them and damage the threads or plastic. Close the sunglasses holder, and the installation is finished.